I’m excited to share this updated 2024 tutorial on bundle dyeing with flowers from your garden or an old bouquet. You’ll discover how to create beautiful, eco-friendly designs using natural fabrics and foraged blooms.
This guide is perfect for sustainable fashion enthusiasts, crafters, creatives, and DIY lovers.
Introduction
Responsible Sustainability
In today’s world, sustainability is more than just a trend—it’s a responsibility. When you choose to use natural and recycled materials for dyeing, you’re not just creating something beautiful; you’re making a statement. Natural dyeing reduces environmental impact, supports a circular economy, and aligns with the values of eco-conscious crafting. This method allows you to be part of a larger movement, where every creation contributes to preserving our planet. Embrace this opportunity to turn your passion into a positive force for change.
Trends
Natural dyeing continues to evolve, and staying updated on current trends can inspire and boost your crafting journey. Upcycling, for example, transforms old garments into fresh, stylish items using bundle dyeing techniques. Zero-waste projects are another exciting trend where every part of a fabric or flower is utilized, ensuring that nothing goes to waste. These trends reflect a growing cultural shift towards minimalism and conscious consumerism. By integrating them into your work, you keep your creativity relevant and impactful.
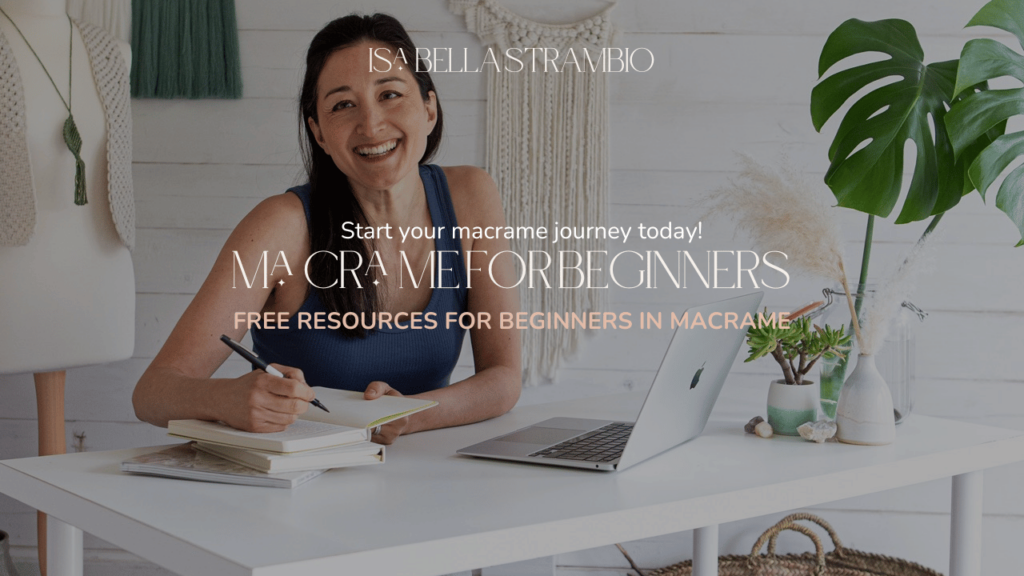
When I started my macrame journey, I also learned natural dyeing.
My journey into natural dyeing
We moved to Sweden in June 2024, but while living in Hampshire (UK), during Spring we used to get lots of flowers in our garden, many were weeds, like dandelions or forget-me-nots, and they lasted just a few weeks so back in 2020 I was inspired to start exploring a new way of dying with flowers. The following autumn, I wrote this tutorial, which is still appreciated by many of you.
During the year you might get a beautiful flower bouquet, once it’s old, before you through it away, why don’t use the petals to make a bundle dye?
Tips for bundle dyeing
To bundle dyeing with flowers, you can use any natural fabric like wool, cotton, linen, and silk. Old t-shirts, tea towels, pillowcases, and fabrics that you can turn into anything. The great thing about natural dyeing with flowers is that it’s a bit like magic, the result is always a surprise, even if the patterns and colour might fade after a year or so, you can always dye them again. If you like to find out more about natural dyeing, you can check out my book “Macrame for the modern home” where I dedicated a full section to natural dyeing.

TUTORIAL
Equipment:
Fabric that you want to dye (pre-washed)
Vinegar
Water
Bowl
Various types of flowers and leaves
A pot or steamer
A sieve (if you don’t have a steamer)
Twine/strong rubbers
Thongs
STEP 1- How to prepare your fabric/t-shirt
Make sure the fabric you want to bundle dyeing with flowers is pre-washed.
Next, you need to mordant (to fix the dye) your fabrics.
There are two options:
1. Do it now using one of the methods from my book “Macrame for the modern home”
2. Or later using vinegar
STEP 2
Wet your t-shirt/fabric by soaking it in water for a couple of minutes.
Squeeze the water and lay it flat.
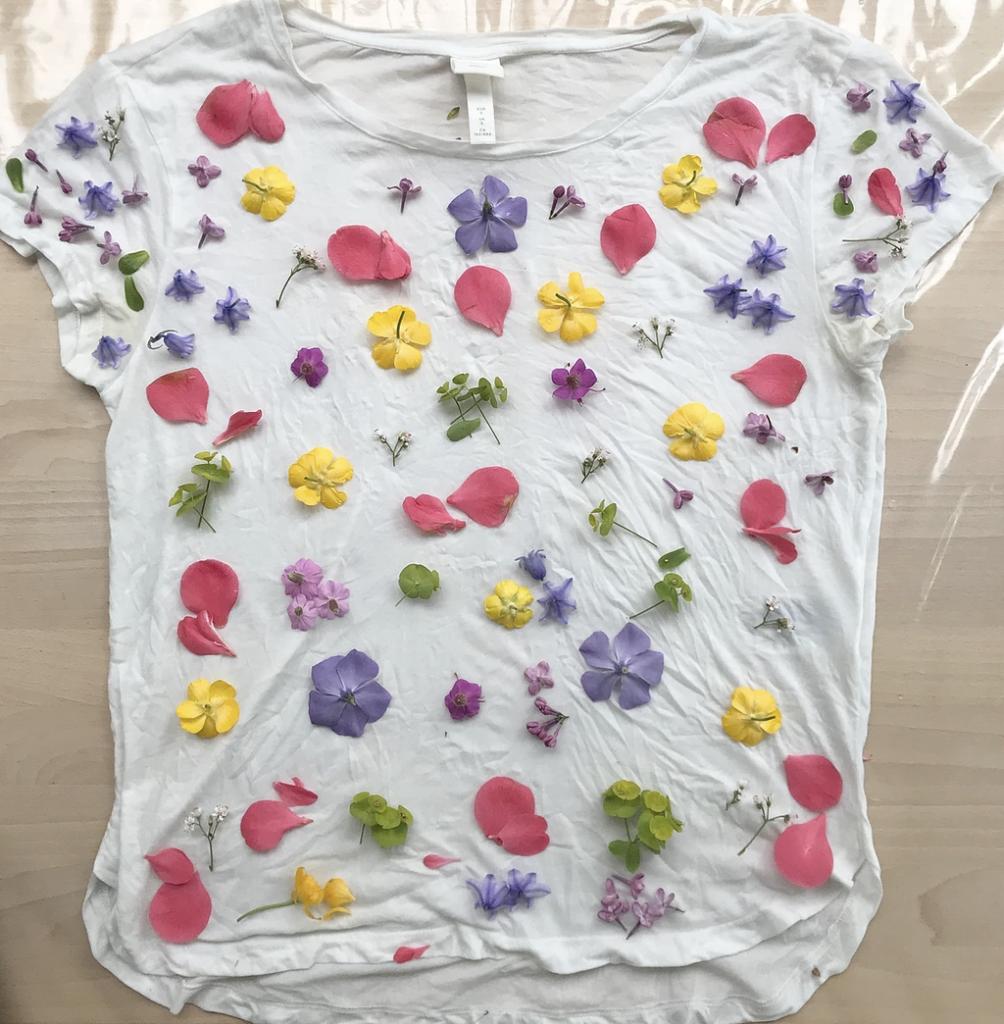
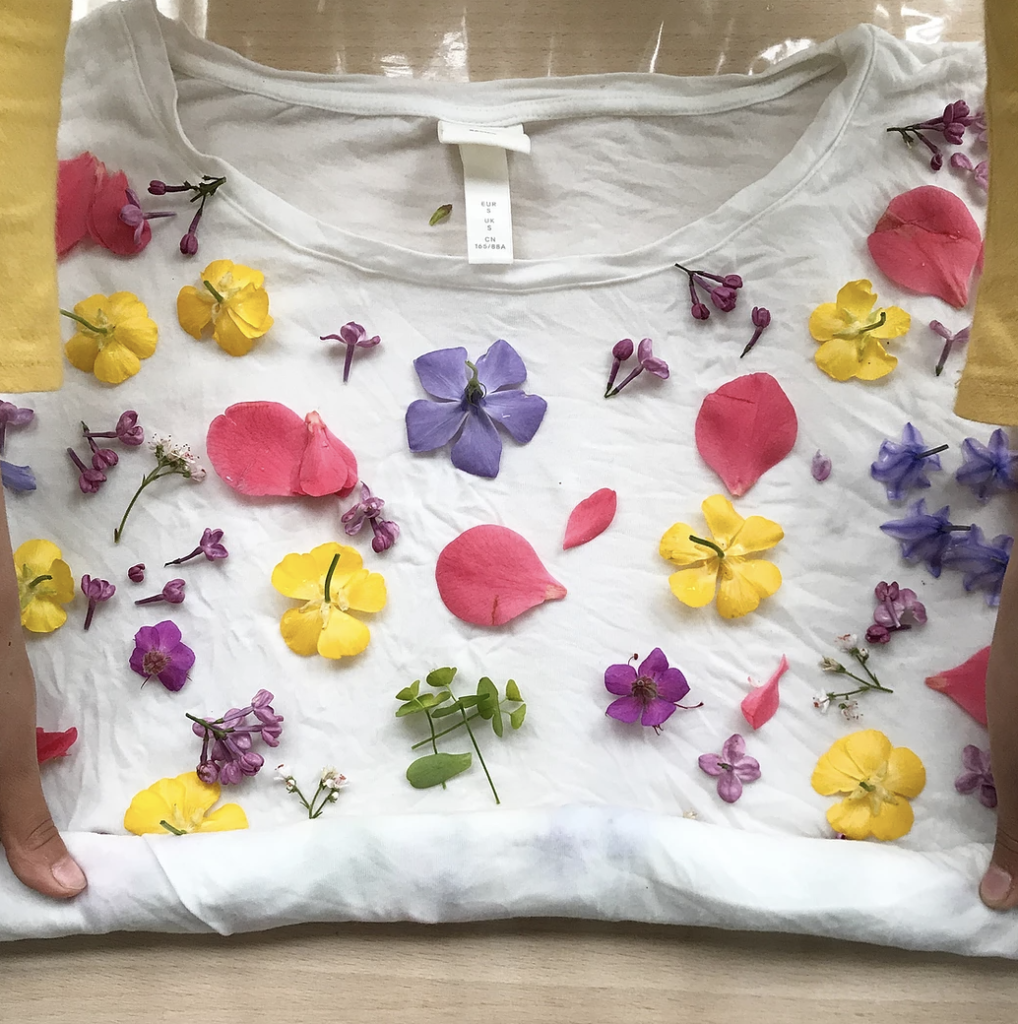
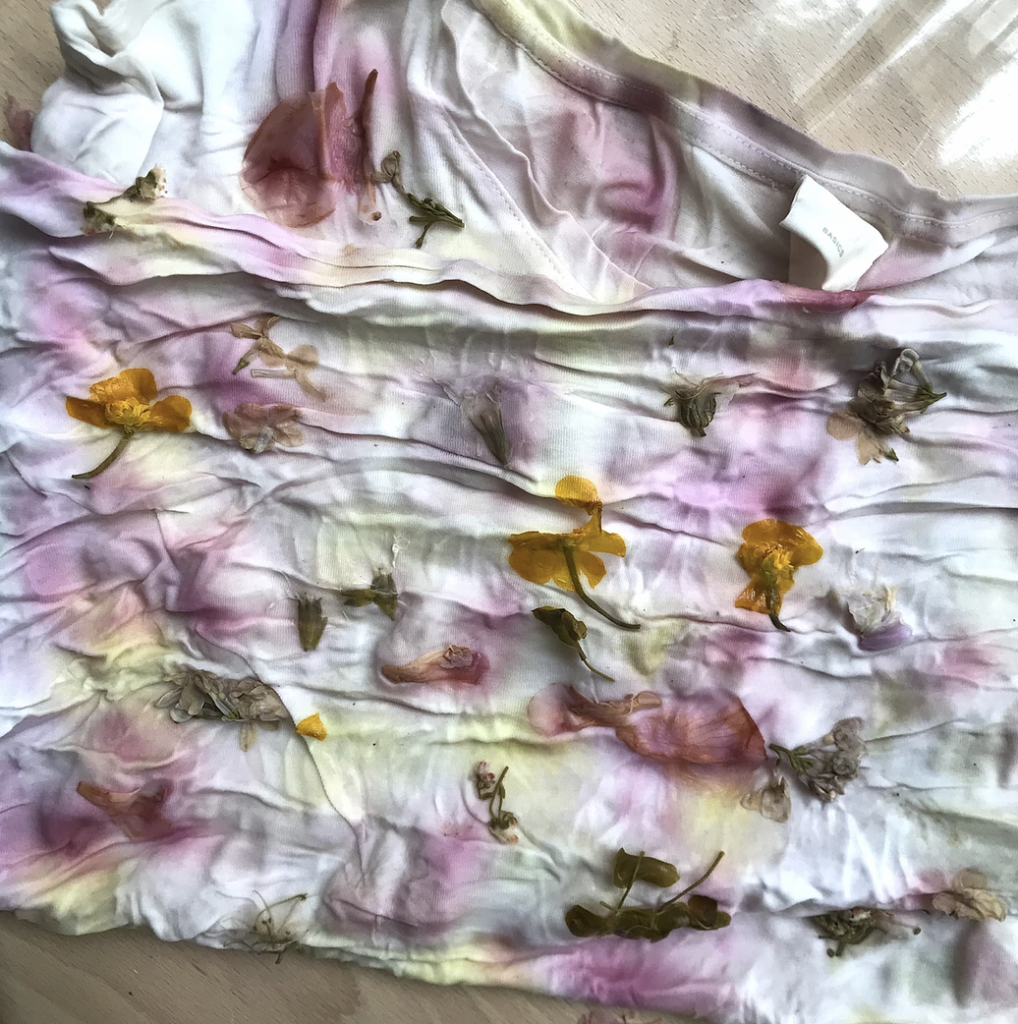
STEP 3: how to place the flowers
Place your flowers and leaves on your T-shirt. If you don’t have enough to fill the whole surface, just fill half and then fold the t-shirt in half.
STEP 4
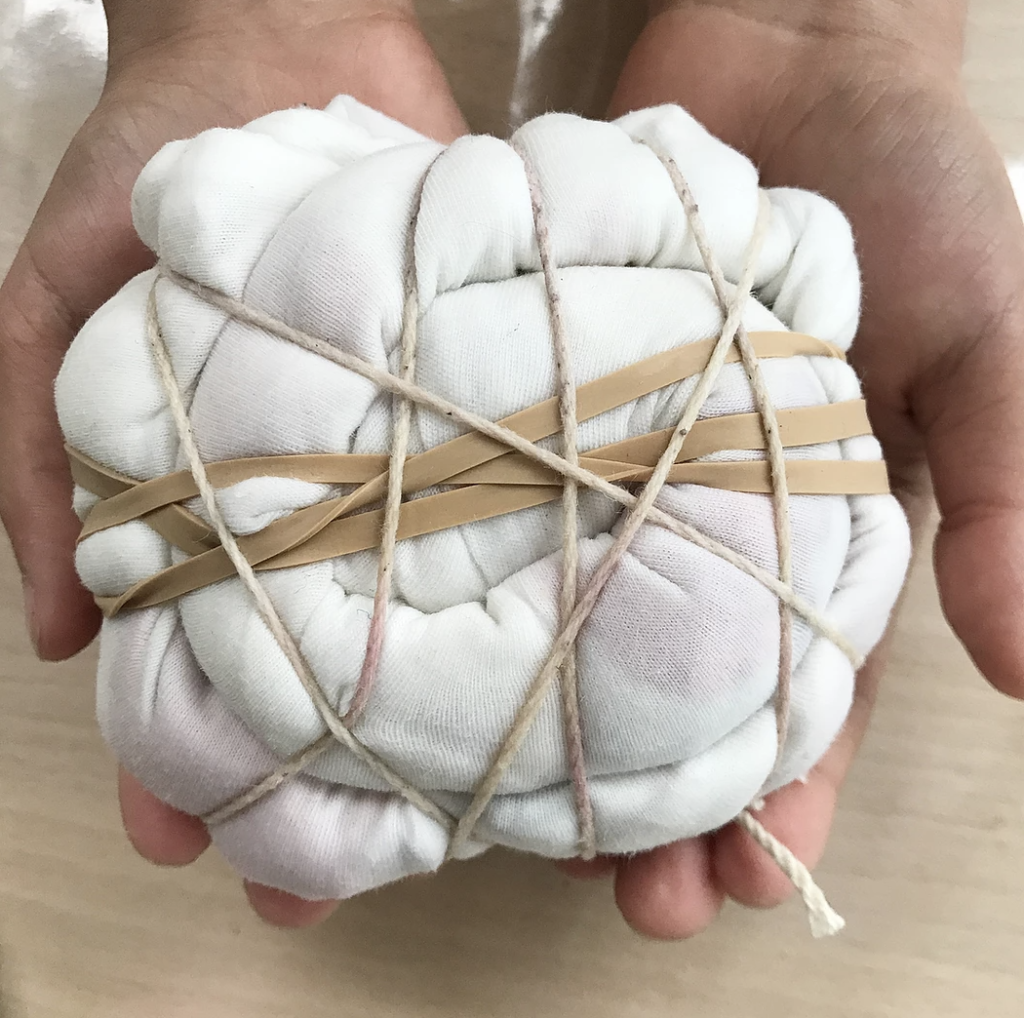
Start folding your fabric into a sausage.
STEP 5
Wrap and tie tightly with twine or strong rubber.
Twine is preferred, as some low-quality rubbers might split with the heat.
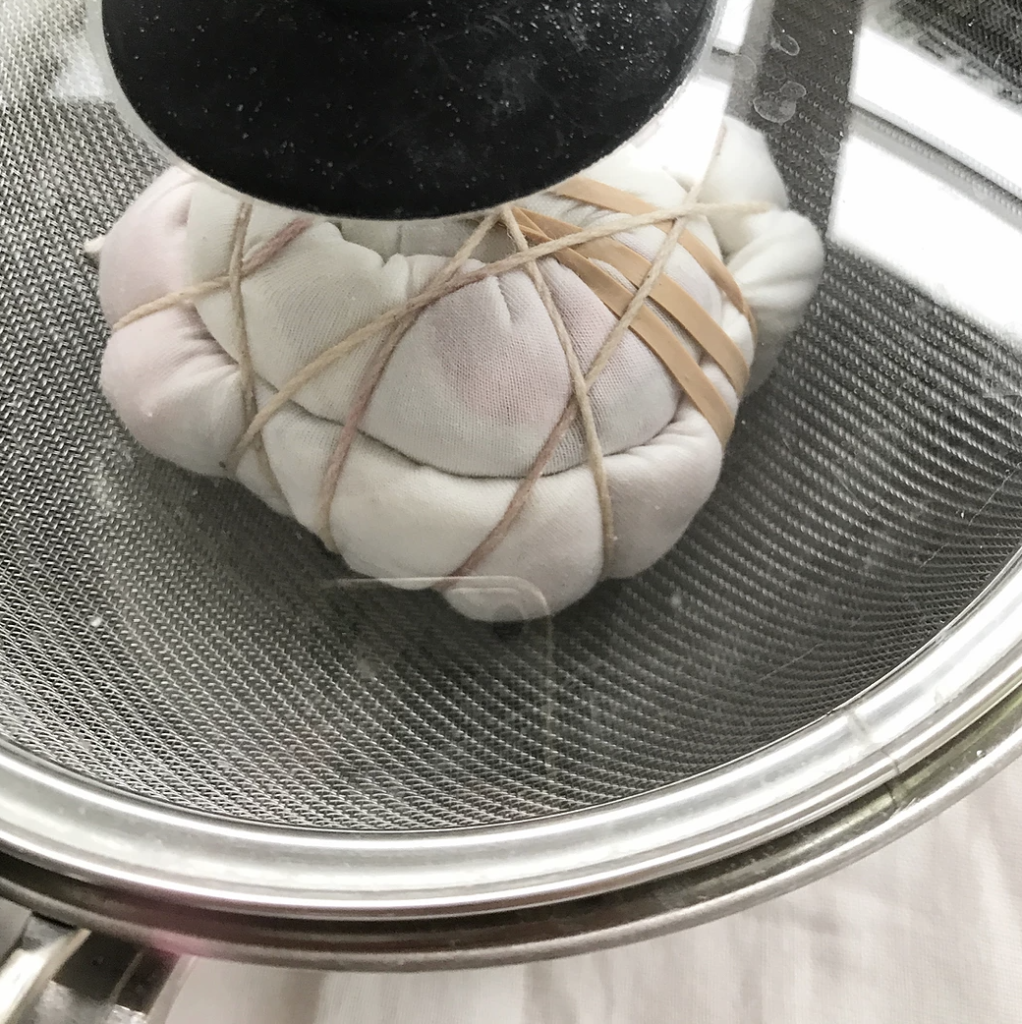
STEP 6
Steam between 1–2 hours in a steamer or place 4/5 cm of water in a pot, add a sieve and place your bundle on it, close the pot with a lid. Turn the bundle every 30 minutes using thongs.
Let the bundle sit overnight.
STEP 7
Unwrap the bundle and remove the flowers. Soak the t-shirt in a bowl with vinegar about 200-400ml depending on the size of your t-shirt or fabric. Let it dry (avoiding the direct sun).
Once dry, wash it in cold water with a delicate detergent, the vinegar smell is horrible, and let it dry again. Finally, iron it to help fix the colour.
STEP 8
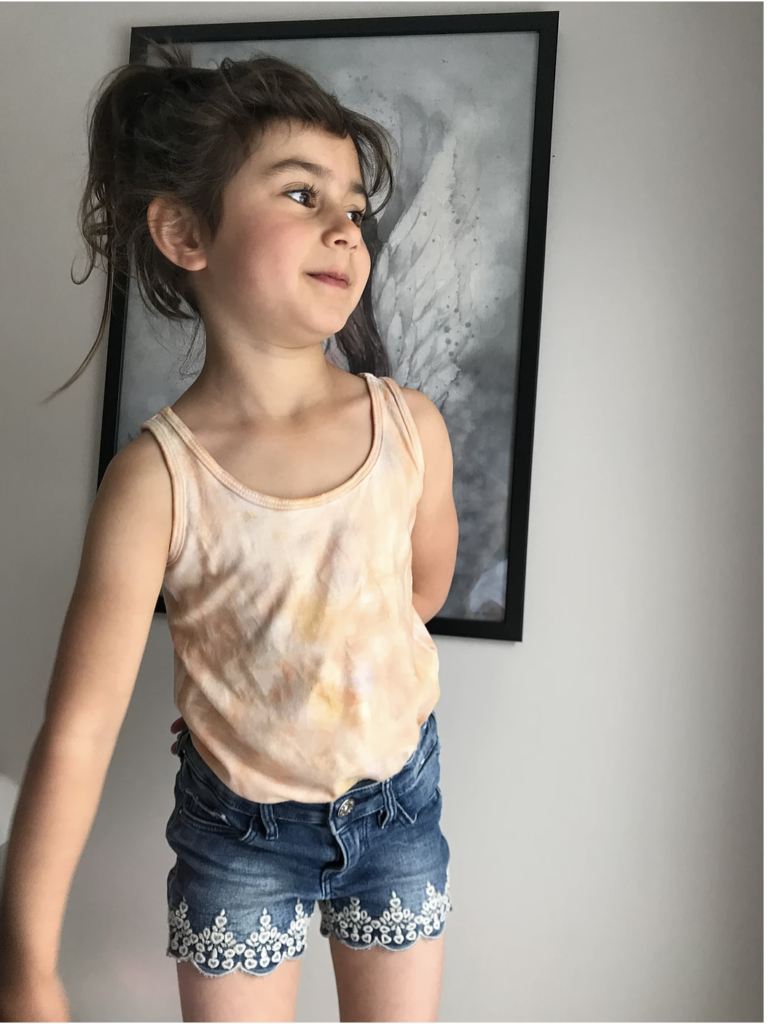
Wear it and enjoy it!
NOTE:
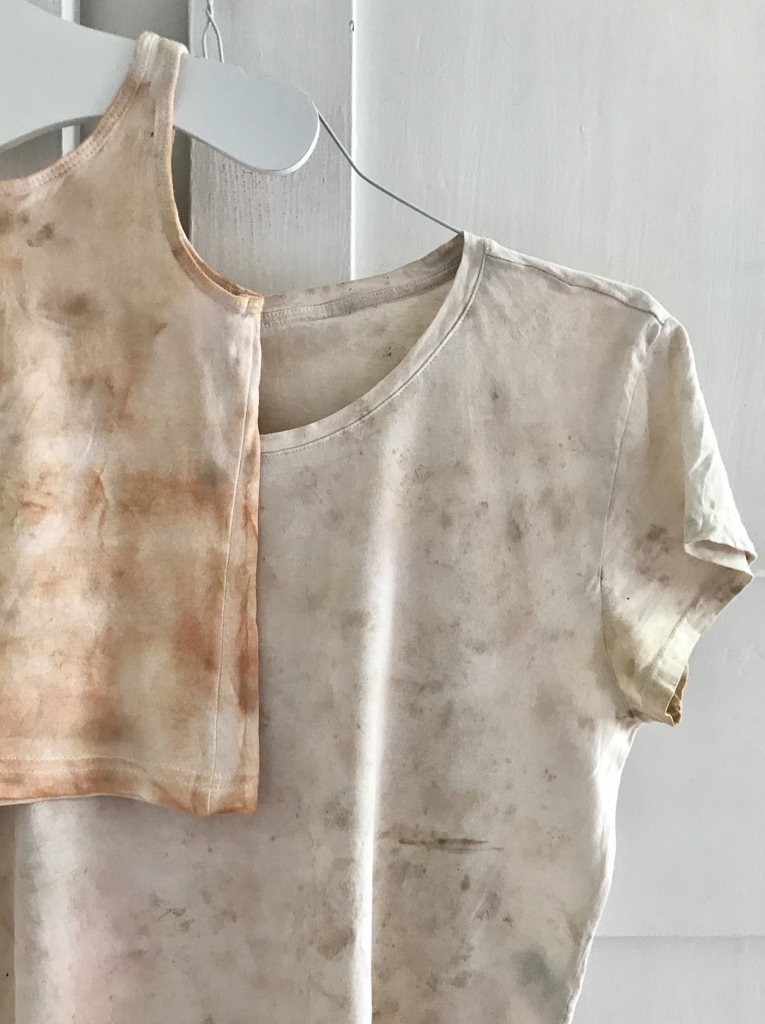
As you can tell from the photos below, even though we used 90% of the same flowers for both my t-shirts and my daughter’s tops, the final result is quite different. That’s the magic of natural dyeing. The quantities of the flowers used, the type of fabric, the amount of vinegar/type of vinegar, how tight you made your bundle, and how long you steamed the bundle for, are ALL factors that can have an impact on your final result.
AFTERCARE:
Hand wash in cold water with a delicate detergent or hand soap.
The colours will fade slightly. Dry away from the direct sun to protect the colour. Natural dye again the following year and let the fun continue.
Final Thoughts
I hope you have enjoyed this tutorial, I have another tutorial on solar dye in my Instagram post here.
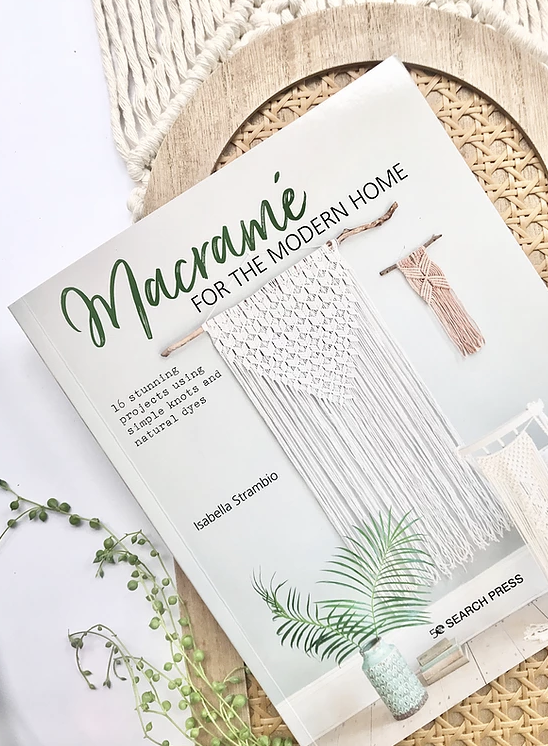
Also, you can find out more about natural dyeing and macrame in my book “Macrame for the modern home” here.
Please remember that engagement is key to fostering a vibrant crafting community. I encourage you to share your bundle dyeing projects on your social media and tag me _twome, or if you prefer, email me, so I can reshare your work!
Start your bundle dyeing with flowers journey today!
Take care,
Isabella.
Learn Macrame
All things macrame in one platform!
If you are already passionate about Macrame and want to strengthen your skills, I’ve created the online courses and the macrame community, I wish I could have taken it in the early days, I started my Macrame journey.
There’s something for every level, from entry to more advanced, I am sure you will find what’s best for you! Check my Macrame Courses Page here!
In the same page you can also find the best live macrame classes near you and meet me in person!
Beginner in Macrame
Transform your passion into a business
Need more small creative business growth tips, news & strategies?
Check out my FREE CREATIVE BUSINESS RESOURCES HERE
Join the “Hello Creatives Academy” Newsletter to receive my free bi-weekly email updates on how to start & run a creative business.
Have any questions? Want to chat it through? Come see me on my Instagram pages, I hang out in the DMs daily and would love to hear from you!
- For everything Macrame: @_twome
- For dedicated Small Biz Tips: @hellocreatives_academy